Insert Background Code Here

Hover over an image to Pin It

Sunday, January 5, 2020

From Yogurt to Greek Yogurt to Cheese. Yes, please!


Making yogurt at home is super easy with an Instant Pot. I have an Instant Pot 6 Quart Duo  with an accessory glass lid for yogurt making or slow cooking. You may use the sealing lid, vented. It will not come to pressure and you may open it at any time.

All cooking utensils/pots should be super clean. I mean clean. Run them through your sanitizing cycle in the dish washer or use boiling water. 

Add 1/2 gallon to 1 gallon of 2% or whole cow's milk to the instant pot.
Press the yogurt button and adjust until the display reads "boil"
I like to stir mine periodically to keep it from sticking and to ensure even heating.

The milk should reach a minimum of 180°F

(You may also heat your milk slowly on the stove top in a heavy boiler.)

After milk has reached 180°F, remove the cooking pot and cool. 
You may place the pot in an ice bath to speed along the cooling process. Have a thermometer handy because it does not take long. 

Cool milk to 110°F and remove from ice bath. You want the milk between 100°-110°F.

Whisk in starter culture (yogurt from your last batch).

If using frozen culture (dollops from your previous batch), like in the pic above, allow to thaw before whisking in. Do not heat to thaw, you will kill the cultures. That will not be nice. 

Gently stir the culture into the pot of milk. 

For starter culture for your first batch, use plain commercial yogurt with LIVE active cultures or plain yogurt from a friend. For subsequent batches, you can freeze some of the yogurt from the last batch you made. 

Sources say to use 1 tablespoon yogurt per quart of milk. Honestly, I just take a big spoonful and plop it right in. It is fine. Don't overthink it.

Press Yogurt button and it will automatically incubate for 8 hours. The longer you incubate, the more tangy it becomes. I usually let mine incubate between 6 and 8 hours.

If you don't have an Instant Pot/yogurt maker, just cover and wrap heavy towels around your saucepan to insulate it. Let it sit in a warm place for 6 to 8 hours. 

Wait.
(the hard part)

I usually make yogurt in the evening so it can incubate overnight.

When complete, remove yogurt to freeze to start your next batch. It is easy to freeze in ice cube trays. You can measure it out in each section so you will know how much to thaw. 

You now have creamy yogurt! You may flavor it or use it as you wish. 

This makes a thin yogurt. You will need to stir in the whey.

For Greek Yogurt (thick), keep reading.


Greek Yogurt is strained plain yogurt. It makes it somewhat thicker. 
Wet a doubled cheesecloth or cotton towel (I use 100% cotton bar towels) OR use a Greek yogurt strainer. 

Place a colander over a bowl and line with the damp towel or cheesecloth.
Add the yogurt. You can see the liquid whey in it.
Twist the top of the cloth and place in refrigerator.
The liquid dripping out is whey. Don't toss it! It is oh so good for you. More on that in another post.

Strain until you reach the consistency you prefer. We like ours thick. I strain about 3 to 4 hours. You can always stir some whey back into it if it gets too thick. 

For Labne (Labneh) Cheese - aka Yogurt Cheese,

keep reading. 


All it takes to turn your Greek Yogurt into cheese, is straining time. I usually strain it for about 12 hours. It becomes thick and creamy and delicious. It can be substituted for sour cream, made into dips, or used as toppings. Our favorite way to eat it is on a waffle with pear or muscadine jam. I also put it in chili. 

I/2 gallon makes about 1 1/2 pints. I usually put it into a Mason jar or Weck jar for storage, but you may store in any airtight container. 

Sunday, October 8, 2017

The Creek

Part of our dream was to have hunting land, a creek, and a place to have a vineyard and a garden. Our place did just that. Although the creek isn't deep enough to catch eating size fish, it is big enough to play in. I know for a fact it has some deep spots that will go over the top of my boots!

 This is Florida Anise. Deer don't love it, but it smells sweet when the leaves are cut or broken.


Saturday, September 30, 2017

Making "The Farm" Ours

Troy has been after me to blog our house adventures. We have lived on family land all our lives, but we finally branched out, broke the cycle, and bought our own slice of heaven. We started this new adventure in February, 2015. We lovingly call it, "The Farm."

The Farm already had a barn. We just had to make it our own. It was very grown up around.
Troy worked diligently, removing the sweet gum trees that have grown up all the way around it.

Looking better!! The inside is full of the previous owners stuff. We focused on land clearing and cleaning.

Sunday, August 24, 2014

Keeping My Head Dry Doesn't Mean I Don't Care

I love my friends.  I do appreciate them calling me out to do the ALS Ice Bucket Challenge, but please let me explain why I refuse to participate.

I am a nurse practitioner and a former ER and hospice nurse.  I have watched patients die of this terrible disease.  I was there to bear witness of the pain in families eyes when they felt helpless.  I was there to feed, change diapers, medicate, and provide TOTAL CARE to patients.  This disease is TERRIBLE.  It takes away your independence... and eventually, your life.  Unmercifully, not soon enough. If you can imagine losing the use of your muscles, you would only visualize a portion of what this disease is like.  Keep in mind that your bowels, heart, and lungs all work with muscles.  No holding a fork, no scratching that itch.

According to alsa.org, donations this month have skyrocketed, thanks to social media.  Launching the challenge on August 6, 2014, donations continue to climb.  The website reports $31.5M on Aug 20, $41.8M on Aug 21, $53.3M on Aug 22, $62.5M on Aug 23, and $70.2M on Aug 24.  That is amazing.  I pray the money is used wisely.

As a proponent for human life, I am an opponent of using human embryos for study.  ALSA is open about their use of human embryos for study, but does state it raises "ethical concerns."

Besides the ethical concerns, when has asking for donations turned into bullying?  "People can either accept the challenge or make a donation to an ALS Charity of their choice, or do both."  I'm not sure I agree with that.  I want to donate to a cause that I feel strongly about, but I don't want to be "forced" do do it or made to feel less than human if I don't.  I have charities that I support.

With that being said, I'm not trying to encourage you not to donate.  Pray about it.  Research it for yourself.  If you feel led to donate, please do.  As I said earlier in this blog, I have seen what this terrible disease does to the body and to the lives of the people who are fighting it.  I've watched them give up.

If you decide to donate to other organizations and don't know where to start, I've listed some that I have donated to and feel strongly about.  There is no pressure for you to donate, but if you do, please research for yourself.  I won't throw anything on you, inflict any harm, or make you feel bad if you don't.

Sav-A-Life - No matter which side of the "Choice" debate you are on, I think we can all agree that women can only make the right "choice" if she is well educated.  They educate women and provide counseling as well as free pregnancy and STD testing.  Ultrasound machines are used in their assessment and education.  They also provide ongoing care to women and men.  What if the cure for ALS or cancer is discovered by one of those saved?  What if it was going to be discovered by one that wasn't?

Hospice - donating to a hospice of your choice provides patients with end-of-life medical care and supplies that are greatly needed

The National Ovarian Cancer Coalition -  Are you aware that most women who are diagnosed are already in stage 3?

Autism Speaks -  Raising awareness and research.

The Urban Alternative - Connects with schools and the community

Focus on the Family - Read what they are about. This includes parenting, counseling, marriage, and faith.

Friday, August 1, 2014

Pickled Tomatoes

Pickled tomatoes. Can you believe it? Yes, I love pickles, but this seems a little over the top, you think? Naaaah... Let's go for it.

My grape tomato plants are working overtime. I'm also a klutz. What do these two things have in common? Lots of ripe and green grape tomatoes that need eating. I knocked a bunch off my plants when I was moving around in my garden and it is not possible for me to wait for them all to ripen. The ripe ones will spoil if I wait.

Searching high and low, I found a recipe that sounded similar to what I was looking for, thanks to Pretty Prudent. Although I followed the recipe very closely, I had to give it my own spin.

This recipe makes 3 or 4 pints, depending on how tightly you pack your tomatoes, as well as their size. You will also get some evaporation during the simmering process.

INGREDIENTS:
1 1/2 Cups Apple Cider Vinegar
1 1/2 Cups Water
2 Tablespoons Pickling Salt
2 Tablespoons Sugar
6 Garlic Cloves, Chopped
6 Whole Peppercorns
1/4 Teaspoon Turmeric
3 to 4 Pints Grape/Cherry Tomatoes - Various Stages of Ripening

TIP: 2 Pints = 1 Quart

Prepare your pint or quart jars by washing in warm soapy water and boiling for 10 minutes. Or, since we aren't canning these, you may use the sanitize function on your dishwasher instead.

Wash tomatoes well and use a skewer or, like I did, a Pampered Chef Hold 'N Slice to poke holes through the tomatoes. I pierced them on 2 sides, going over half way through each time.  The green tomatoes are tough so be cautious and don't poke your hand.


Pack the holey (not to be confused with holy) tomatoes into the prepared jars.

Mix vinegar, water, and seasonings in medium saucepan. Bring to a boil, then simmer for 5 minutes to blend the seasonings. Cool to room temperature and pour over tomatoes.

You may use a fermenting weight to hold the tomatoes down, if you have any that try to float.

Since we are not canning these, I used a plastic Ball storage lid, but you may use a canning 2 piece lid (may be used previously) and band.


Store in refrigerator. I have recently made these, but Pretty Prudent says they will store refrigerated for months.

Wait at least 5 days to a week before tasting. The green tomatoes take a little longer to absorb the seasonings and vinegar. Delicious!

Again, Pretty Prudent suggests using them in salads, pasta salads, cheese plates, relish for burgers and hot dogs, martini and bloody Mary garnish.  I have been eating them right out of the jar, however, they make great garnishes as well as gifts.

I have never canned a tomato with its skin on. I suppose it would become tough. I always recommend tried and true recipes for long-term storage. Recipes from Ball or your local extension office are good places to start. Most tomato recipes that I use require adding lemon juice concentrate (Tablespoon per pint) and processing in a boiling water canner for 45 minutes, which I would think would not give you the consistency you would want in a tomato pickle.

 Good luck!


Friday, July 25, 2014

Shoo Fly, Don't Bother Me

Living on a small farm comes with perks, and pests. Poo, like rabbit and chicken poo will work wonders for your garden, but it sure does draw the pests. House flies love it. They can find it from miles around (I am sure).  What can we do about it? Trap them!

Sure, eliminating the poo would be ideal, but not possible. Besides, my worms would not appreciate it and my plants would not be as green. 

Making a fly trap is easy! 

You will need:
A plastic 2 liter soda bottle
Sturdy tape, such as duct tape or packaging tape
1/2 Cup Sugar
1/2 Cup Syrup - maple, pancake syrup, or dark corn syrup
1/2 Cup Apple Cider Vinegar
Water
Drop of Dish Soap

Easy Directions
Cut the top off the soda bottle at the "shoulders" so it will invert and fit down inside the bottom part of the bottle. Kitchen shears work great. 

Mix the sugar, syrup, and apple cider vinegar in the bottom part of the bottle. Stir well until all ingredients are dissolved.

Add a drop of liquid dish soap.
Invert the top of the bottle and place on the lower portion, lining up the cut areas. 

Use tape to secure all the way around. Do not leave any gaps. Carefully add water to bring the liquid level up to about 1 1/2 inches below the opening of the bottle.

Place your trap in areas you have fly problems. 

When full, or just extremely gross, toss/recycle and make another. 

Some of the liquid will evaporate, as you can see in the picture. But, how gross is that?

Tuesday, June 10, 2014

Stop Facebook Game Requests

I see ill comments coming across my Facebook news feed all the time, made by friends who are fed up with game request notifications and the constant flashing lights on their phones. I admit it, I play Candy Crush, but I too hate the game requests that blow up my phone.

People who play games will get game requests in-app, so this feature is really useless to the player, unless they are waiting on something (like in-game help) or want to try new games and like to know what their friends are playing.  Notifications are not for everyone, including me.

Yesterday, I discovered, while I was driving and my daughter and her boyfriend were sitting in the car with me, I was sending game requests to them! I had not played yesterday and I certainly didn't send it while driving!

For some reason, the game requests must send automatically and if you don't want them, don't get upset with your Facebook friends, simply turn the game requests off.

Here's how...

You must use a browser (Firefox, Internet Explorer, etc.) on a phone/tablet/computer to do this.
It will not work with the FB app.

1) Find the drop down menu on the top right of the screen, click or tap it, then choose settings.


2) On the left side of the screen, find and click/tap notifications

3) Under App requests and activity, you will see check marks beside the games you are getting requests from.  Uncheck the ones you don't want.  You may have to choose Show More to get them all while you are here.

Viola! Done... No more requests... unless it is some new game your friend is playing and it wasn't listed here and Facebook wants to blow your phone up again. :) In that case, repeat steps 1-3 and get those new ones out of there.

Here's my disclaimer: Facebook changes things all the time, so please disable your game requests before this tutorial becomes obsolete.


Sunday, May 25, 2014

Tickle Your Funny Bone

As a medical professional and a fellow mom... I get it.
I am on Instagram, just to follow my children.  I am not savvy with it and I don't pretend to be.  I can Facebook better than most of the teenagers around me and often get asked advice.  Don't ask my advice on Instagram.

I totally get it.

Go pee before you read this.

http://www.grass-stains.com/2012/06/how-not-to-use-instagram.html?m=1#comment-725114335


How Not To Use Instagram by Grass Stains

Thursday, May 8, 2014

What's that Font?

If you follow me, you know I love to get crafty.  I use one of those electronic cutters with some computer software that lets me use any font I have installed on my computer.  If you know me, you will know that I have HUNDREDS of fonts.

I use my cutter to cut out fabric for applique and quilting.  I cut vinyl for decals and I cut paper for scrapbooking.  Cutting out letters in different fonts are probably the number one thing I cut out.

Here's my problem... Going through every font to see which one I like the best is for the birds!

Well..... KUDOS to WORDMARK

Wordmark is an online tool that allows you to see all your fonts.  All you do is type the word in the little square at the top and then click "Load Fonts" and viola! The word appears in every font you have.  The best part? It is FREE!  Visit their ads, visit their page and give them a big thank you!!

I just typed "Jill Dunn" in the little box, and look at that! I am just giddy right now! Gotta go cut out some letters!!

click photo to enlarge

Wednesday, May 7, 2014

Cloth Pads


I understand this post isn't for everyone.  This is not a new idea people...

Women have used these since the beginning of time. (Thanks Eve.)

I just want to make you aware that there are alternatives out there and give you something to ponder.

So, here it goes...
*Cotton is more natural than sodium polyacrylate and dioxin, common ingredients found in disposable pads.
*Most of us own a washing machine.
*Cloth pads are super cute, customizable to person, needs, color, size, shape, thickness, length, material, flow, etc...
*It is your body, take charge of it.

If any of the above statements and/or links didn't convince you to switch or, at least, keep an open mind, read this article. The problem for me is that there isn't enough concrete research on this to "prove" how potentially harmful disposable pads are in order for me to say with certainty that they should not be used.  As a nurse practitioner, I want research studies, evidenced based practice to back up my beliefs, patients who report their stories in a medical journal.  I just can't find any.

Think about this. (Just playing the Devil's advocate here.) Studies are often driven by money, correct?  Well, if millions of women are paying big money for "necessary items," why study something that will hurt that income?  I do hope it makes you think.

However, I did find many, many blogs by women who are so obsessed with cloth pads and the benefits of them, they blog about it! Some rave of comfort and some rave of cuteness.  Some want to save money. Some write about it changing their life; less cramps, less pain, less flow, shorter menses duration. Others just want to put less garbage in the landfill while watering their gardens with the wash waste water (not for me), but whatever blows your dress.

Personally, I think the more natural something is, the better.  If you are having any of the above mentioned problems, research or not, what does it hurt to try?  Do your own experimenting.

I probably should mention that these are also really great for occasional bladder leakage.  I have made some for an older family member who is on a tight budget and she loves them.

If you are worried about dye in the cute patterns, use organic, natural material that has not been dyed. Again, customizable. :)

From researching this topic (reading many, many bogs), here's what I have learned about constructing a cloth pad. You decide what your needs are.

You can use used material such as shirts, wash cloths, blankets, etc. Wash it thoroughly first!
Thorough descriptions of some materials linked here.

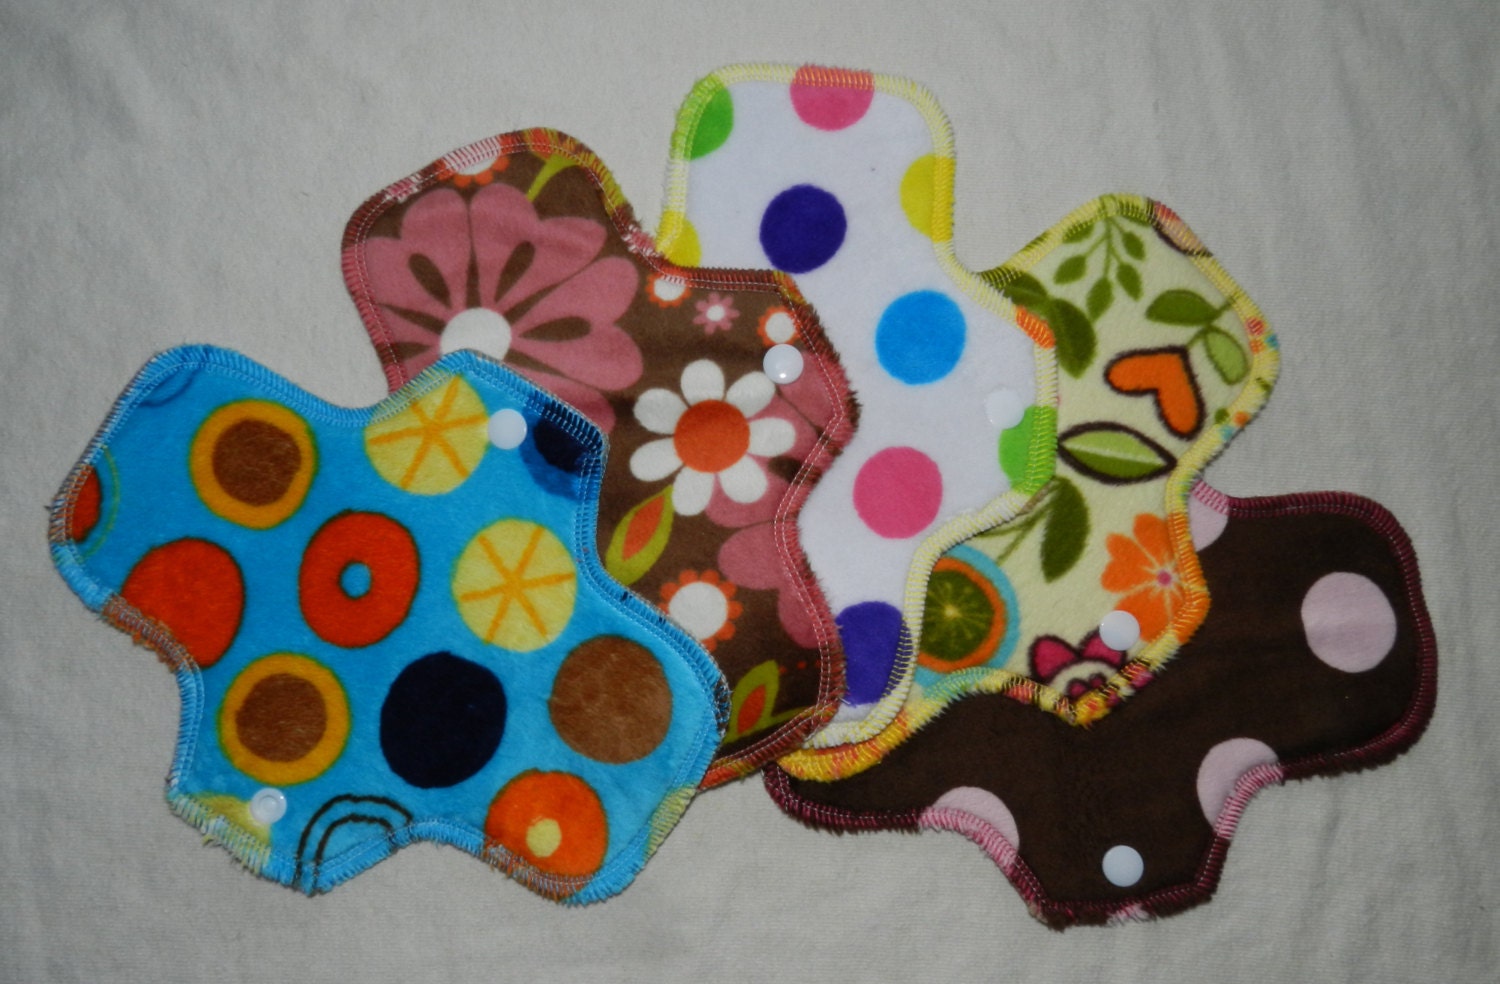
There are a lot of styles out there.  Whether you are purchasing or making our own, explore different styles to see what you like and what will best suit your needs. Here's a few from other sites:

(I have no affiliation with these sites.  I'm just trying to put all the info I find into one place for you. There are probably hundreds of sellers out there as well as people who post their own patterns to buy or for free. I have linked these images to their sources as a courtesy to the stores for using their images.  Feel free to post your own links too!)
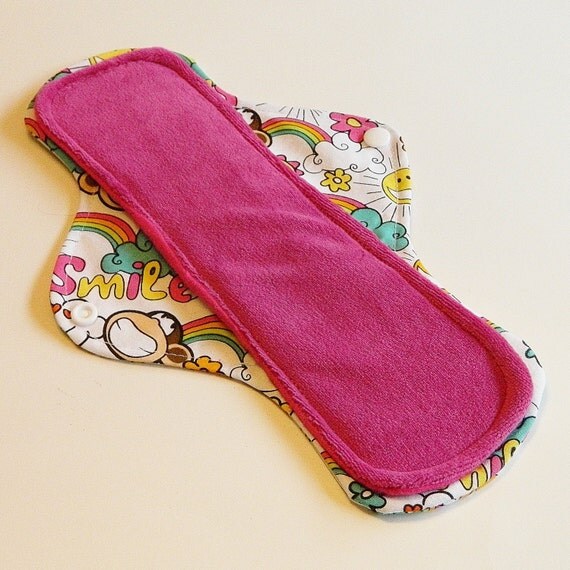
These, from Luna Pads, have exchangeable pads made separate from the wings held in place with rickrack. You just change out the pad during the day and keep the wings in place. Some designs like this allow you to stack multiple pads on the wings so you can adjust your flow. I have seen this design in square pads also.
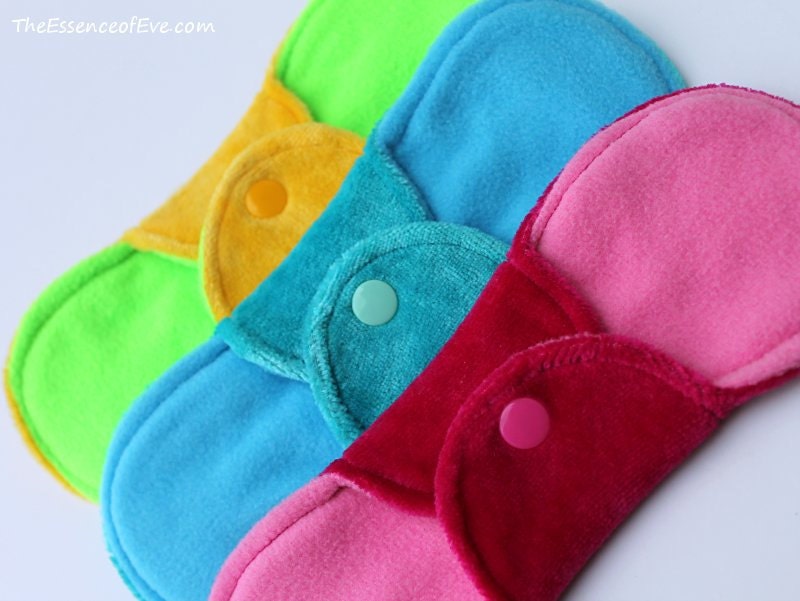
Glad Rags have wings that double as pockets and stacking multiple pads inside the wings can adjust the absorbency.
Etsy, as well as eBay, are also a great places to order from individuals and to get ideas to create your own.  A quick search will quickly give you lots of ideas.


The thing to remember is you can customize.  Don't make a hundred pads before you try out the style.

When creating your own, here's the materials that are recommended.  Of course, you can mix and match the materials.  When I made them, I used flannel for the entire wing, top and bottom, with a lining of PUL so the urine would not leak through the pad and/or wings onto her garments.  I was afraid the PUL would be too sticky or hot if touching her skin, so I put it between the flannel. 

Top Layer Materials
Think absorbancy/wicking and softness because this layer is next to your skin
Minky - soft, short pile that wicks to inner layer
Cotton 100%
Jersey
Fleece - wicks through it to absorb it into middle layer (helps keep top dry next to skin)
Flannel
Velour (try for 80% cotton or bamboo in this polyester blend) - wicks and feels dryer than flat fabrics
Rayon
Organics such as bamboo, hemp, linen, ramie
Felt - not as popular, but wicks through and resists stains

Middle Layer Materials
Think absorbancy while attempting to keep it thin, but you can use as many layers as you need
This layer can be removable for quick drying. You can put several middle layers into one set of wings (bottom layer) depending on the style of the pad so you can adjust your absorbancy as needed. 
I suggest trying several styles out and even mixing and matching your materials
Cotton quilt batting - stitch it down to prevent bunching
Cotton  - those holey husband's t-shirts need a new use
Terry cloth - those stained, used wash cloths/towels you don't want your guests to see work well
Sherpa
Flannel - great for liner but may need more for heavy flow pad
Double napped flannel
Microfiber - very absorbent, but may need to be changed often

Top Wing Material
This layer will touch your thighs. Waterproofing this layer adds extra undie protection.
Cotton
PUL (polyurethane laminate) - with cotton or polyester side on top (next to skin) and film between top and bottom wing

Moisture Barrier/Waterproofing (optional)
Added between layers of wings OR behind absorbent padding
PUL
Waterproof Polyester
Naprap
Synthetic fleece or wool - not waterproof, but helps while remaining breathable
Ripstop nylon - harder to sew
Felted wool - not recommended for the dryer
Fleece - high quality (Polarfleece or Windbloc)
Procare - less flexible PUL

Bottom Wing Material
Helps keep pad in place
Corduroy - especially if going "wingless"
Cotton
Flannel - helps keep in place due to "stickiness"
Felt - helps "stick" to undies

Fasteners
Snaps (I am a fan of KAM snaps, but use whatever works for you)
Buttons
Velcro
Tabbed wings - wide tab on one wing that slips into a loop on the opposite wing

Helpful tips:
Wash all material before cutting and sewing
Do NOT use fabric softener, it will make fabric less absorbent
I think the best idea for cleaning I have seen is to take a gallon pitcher or decorative pot with lid filled with cool water and a splash of vinegar, if desired, to toss them in until wash day.

When sewing a pad, the easier the better. I basically took an overnight disposable, traced it, modified it, and cut out a pattern.

I hope this post has given you some ideas. Please feel free to share your thoughts.

Here are some pattern links to get you started.

Sunday, May 4, 2014

I found a really cool blog about soil cube makers.  I am really interested in this and I want to learn more.  Until I can blog about it, here's the link... Daily Bread Living

Soil cubes are are little blocks of soil used to start seeds.  The roots air prune themselves, as long as the cubes are not touching, then the roots can grow into the cube beside it.  It is easier on the plants because there is no root shock when transplanting.  You don't have to peel the bottom off the containers that decompose.

From my various readings, to make soil cubes, you simply mix water with your seed starting soil until it becomes the consistency of oatmeal. I am not interested in using peat, since it is not considered a renewable resource. 

Soil cube makers can save you money since you can use it over and over.

Maybe I will be able to post a tutorial later.  I have tried to contact Daily Bread Living's blogger for more information.

I'll call this entry: To Be Continued...

Photo from http://dailybreadliving.com

Thursday, May 1, 2014

Don't get ticked off... Get the ticks off!

It is a silly title for a not so silly topic. Ticks are not just gross, they can also be dangerous to our pets, as well as us. We have outdoor dogs and no matter what prevention or remedy we try, they still get ticks. I cannot touch them! That is why I got married. Having a handsome, manly man around to do that job is the way to go!  However, my manly man works, so it isn't always possible to have him do it.  I can't stand to leave them attached and alive.

Today, I noticed a very big, blood sucking, disgusting tick inside my dog's ear.  It was one of those that got bigger with each gulp of blood.  Like a balloon from a horror movie. What to do?? I had to take matters into my own hands.

I remembered something about cutting a "v" into the end of a plastic spoon and scoop the tick into the slot to make it come out. I tried that and it worked, but not as well on all the ticks.

I also remember, as a teenager, arriving at the home of the boy I used to babysit just to discover his mom holding a pair of pliers with blood droplets all over them and the front of her shirt.  Do not try to remove these balloon ticks with pliers! They explode!

I opted for my own reinvention.  Grabbing a plain, disposable plastic fork and my kitchen shears, I went to work. I turned this...


Into this...


I suppose I could have left the tines long, but the tick was inside the ear and I couldn't get it into the end of the "v" of the tines. Now, all you have to do is catch the little blood sucker between what is left of the tines and keep pushing it toward the bottom, or the "v" of the tines... Continue on until the tick pops out. It worked great!

I purposely cut them at an angle. It gave me different slot sizes to choose from.

I couldn't get it to work on the flat ticks, but those are okay to grab with the tweezers, before they get engorged.  Just be sure to grab them in the head and not the body. If you squeeze the body, you can make them expell bacteria back into the dogs skin and cause infection.


So, what do you do with the ticks you remove?  If my dad has visited and he pulls it, he tosses it to a chicken.  Problem solved. If removing several, I may get a little cup of bleach and drop them in as I remove them. If it is one big one, I have been known to flush it (picture a huge sewer tick coming back for revenge).  When the ticks are flat and I just remove one, I pinch it between tape and toss it in the trash. This method works well with fleas too.

Saturday, April 19, 2014

This isn't your ordinary trellis

I have taken a semi-vow not to plant anything I can't eat. That is why I have food growing in my flower bed :). The vow can't be a full-blown vow, because I can't part with my orchids. Are they edible?


I love whimsy. I love having fun and finding things that are out of the ordinary. When I came across this metal dress form while "junking" with my sister-in-law, I knew I had to have it for my garden.  I planted some melting sugar snow peas and they needed some support. I thought, "Why not?" and went with it.
 Placing the form where I wanted it, I made a line in the dirt as a guide for planting. I planted the peas where they would be just under the back of the form. I then placed the form on top and used two electric fence posts to support the dress form, securing them together with zip ties. I should have painted the orange posts black, but didn't have any paint on hand.
This is how it turned out.

 Cute, huh? I hope to add some updated pictures as they grow and let you know if this is as practical as it is cute. Please share your ideas too!


Monday, April 14, 2014

Save the Dirt for the Seeds

It drives me crazy when dirt falls out the bottom of my pots when I am starting seeds. To remedy this, I just cut a little piece of paper towel, newspaper, or a coffee filter and pop it into the bottom before filling it with dirt. Problem solved!

Wednesday, March 26, 2014

Continuous Flow-Through Worm Composter DIY Tutorial

I have had composting worms for many years.  I have evolved in my methods, changing systems as our needs change and to figure out what works best for me and my family. If you go way back to my childhood, I raised worms in a gallon pickle jar for fishing bait and had no idea then that in the future, they would eat my garbage and fertilize my plants.  I have learned so much over the years and thank all the people out there for posting excellent information! 

I have successfully used The Worm Factory for many years.  In fact, I liked it so much, I have two.  Today, I am using one and have moved all the contents of the other one to my re-purposed, never used as a worm bin before, old as the hills, very sturdy, garbage can composter.  I made it myself :) *imagine me smiling really big*

It was so easy!  I scanned the internet looking for ideas. There are some smart and crafty people out there.  I'll post some links at the end of this tutorial in order to give them credit, so be sure to stop by their blogs/channels and show some love.

I have had this garbage can for 20 years.  That is when everything, and I mean everything, was either country blue or mauve.   When the colors finally went out of style, I moved the can into my laundry room, where it has resided.... until now.

The first thing I did was start drilling holes.  I used 1/2" thin wall PVC pipe so I marked my hole centers about 2" apart and used a 7/8" spade blade to drill the holes.  I left enough room at the bottom of the can to allow me to scoop up castings when it is time to harvest them. 

I put the pipe in the holes and used a PVC cutter to cut them to length.  I left about an inch on each end in order to attach a cap to prevent the pipe from sliding back into the can.
I eyeballed it :)  I just had a long piece of pipe, stuck it in so there was about an inch hanging out the back and marked about an inch on the front.  You can see in the picture below, I also marked a door.  There were plastic supports in the bottom of the can so I just went above them and marked it.  I drilled holes in the corners so I could cut it out.
I have no idea how long the PVC "floor" pipes were  I marked them as I went because the can had some curve in it.  I then used a (very dull) PVC cutter to cut the pipe off and capped it to keep it in place.  I haven't glued it at this point because I was not quite sure if I would need to take it apart for any reason.
I needed a scraper to assist with harvesting the castings and I liked this idea.  The scraper pipe will move up and down, as well as back and forth, which I think will help if the compost is arching (not touching the PVC floor). 
I made the scraper handle stick out the front and capped it too. I did glue all the pieces of the scraper together with clear PVC glue.  I didn't want it to eventually fall apart under all that compost.  The scraper handle is above all the "floor" pipes.

I am not sure if the scraper is going to work as well as I had hoped.  Plan B is to ignore that it is in there and use it in cases of the castings arching.  If it doesn't work, I will harvest from the bottom, using a small garden hand rake to gather castings from between the tines.  I don't think I want to use my hands.  I have an irrational fear of spiders, and you know, there could be a spider in that dark place. Yikes!

Another idea I had for the scraper is to put it under the PVC floor and attach screws to the top of the "T" portion, essentially making an attached rake that will go between the pipes, however, that may be too much candy for a dime. :)  I'd love to know your thoughts as well. 

I used cutters to cut out the door.  I think I could have done a better job if I had a fine toothed saw.  I have seen some posts that just cut three sides and leave one short end attached to make a closing door.  I chose to leave mine completely open.
Ta da!  This is what it looks like finished.  There's a nosy cat checking it out.  I don't know if I will need extra ventilation in the top.  I can certainly go back at this point and put plenty of extra holes in the lid, but as you can see, the lid swings and has a large gap so maybe I won't need any extra ones.
To start your composter, you have to add newspaper to the PVC floor to keep everything from falling through.  Once the contents settle, it will hold itself up.  I wasn't sure if I needed to put the newspaper under the scraper or over it.  I opted for under it.  The newspaper will decompose, allowing harvesting to begin. 
I put the newspaper up the sides a little, just to make sure everything stayed in place.  I took the contents from my Worm Factory and started adding it to the can on top of the PVC floor and newspaper.  The scraper is pushed all the way in at this point. 

This is a picture from inside the harvesting chamber.  It shows the underside of the newspaper on top of the PVC floor.  This will decompose.  I put about 3 double layers. (6 pages total).

I kept adding the contents.  Look at all those worms!  The green stuff that looks like plastic is actually compostable bags.
After I filled it up, I put a few sheets of wet newspaper and printer paper on top.  This will also become worm food, which will turn into castings, which will enrich our garden!

The system I use to gather scraps are BioBags along with the Fresh Air Kitchen Compost Collector by Full Circle.  I usually purchase the bags through Amazon by the 4 pack.

I tried using a washable can, but the convenience of just "taking out the garbage" in a bag is easier for our busy family.  The bags I use are 3 gallon and fit nicely in the the Fresh Air Compost Collector. 


Great links for ideas and education...
In no particular order and links open in new tabs:
How Does a Flow Through Bin Work video
Cool idea, but haven't seen it in action: Hungry Bin

I hope you found this post helpful.  I love to read your comments!

UPDATE:
Although I love the design that keeps my worms working, it will not harvest as expected.  The handle will not push/pull due to the weight on top of it.  I also would like a bigger system to handle all of my organic waste, instead of having multiple systems.  I found a Toter flow through compost system that I really want to try with my worms. It isn't marketed for worms, but I don't know why it would not work.