Insert Background Code Here

Hover over an image to Pin It

Showing posts with label gardening. Show all posts

Friday, August 1, 2014

Pickled Tomatoes

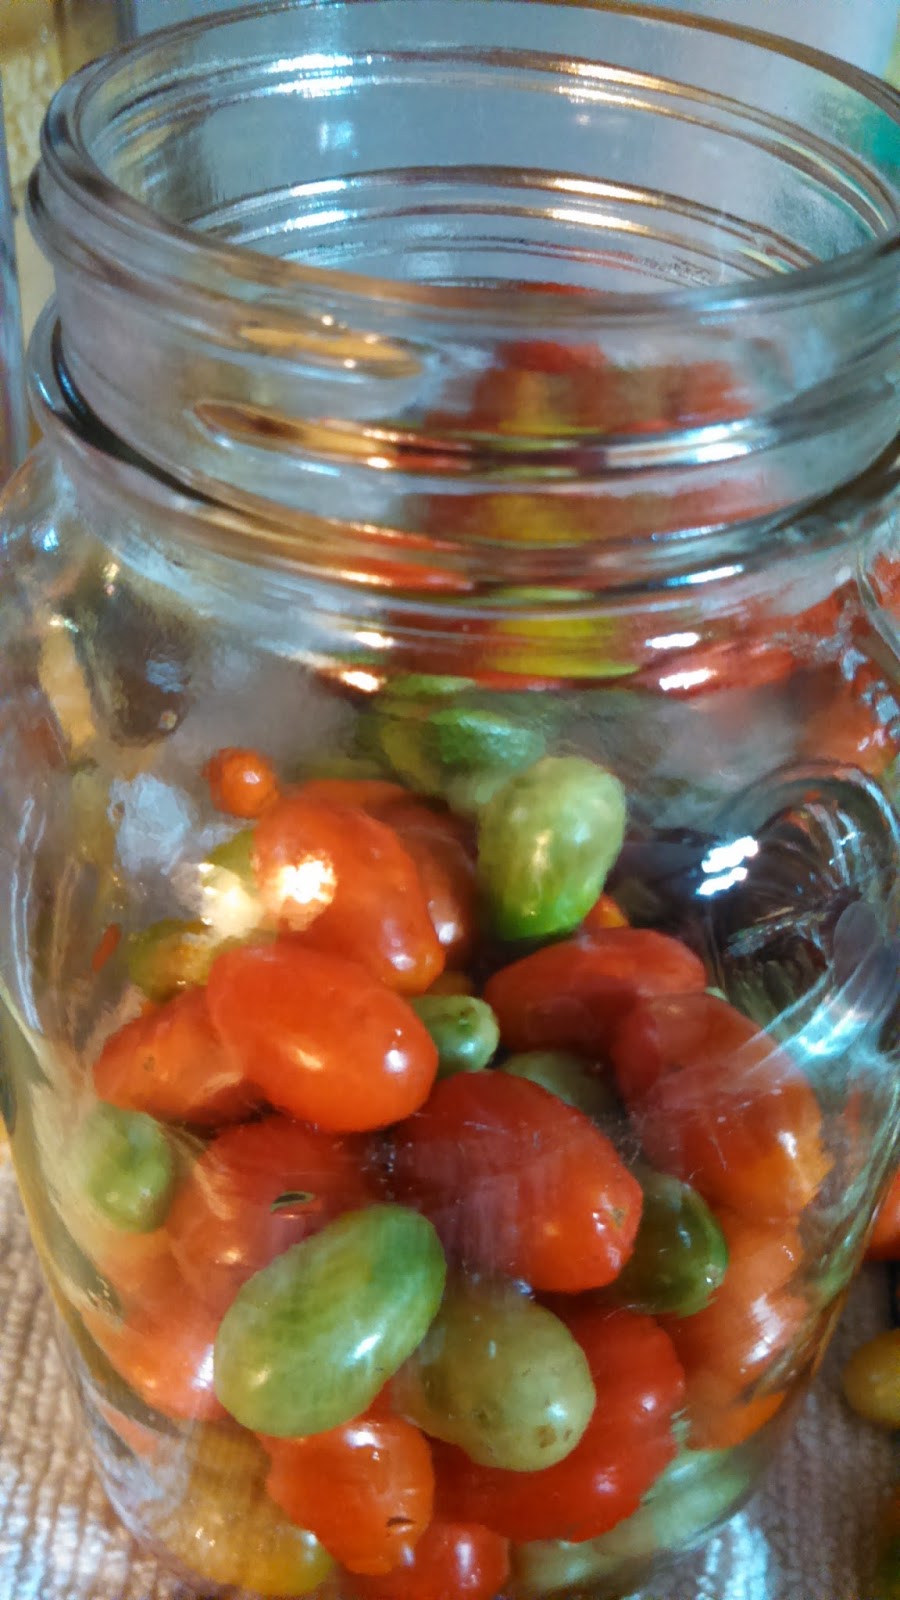
Pickled tomatoes. Can you believe it? Yes, I love pickles, but this seems a little over the top, you think? Naaaah... Let's go for it.

My grape tomato plants are working overtime. I'm also a klutz. What do these two things have in common? Lots of ripe and green grape tomatoes that need eating. I knocked a bunch off my plants when I was moving around in my garden and it is not possible for me to wait for them all to ripen. The ripe ones will spoil if I wait.

Searching high and low, I found a recipe that sounded similar to what I was looking for, thanks to Pretty Prudent. Although I followed the recipe very closely, I had to give it my own spin.

This recipe makes 3 or 4 pints, depending on how tightly you pack your tomatoes, as well as their size. You will also get some evaporation during the simmering process.

INGREDIENTS:
1 1/2 Cups Apple Cider Vinegar
1 1/2 Cups Water
2 Tablespoons Pickling Salt
2 Tablespoons Sugar
6 Garlic Cloves, Chopped
6 Whole Peppercorns
1/4 Teaspoon Turmeric
3 to 4 Pints Grape/Cherry Tomatoes - Various Stages of Ripening

TIP: 2 Pints = 1 Quart

Prepare your pint or quart jars by washing in warm soapy water and boiling for 10 minutes. Or, since we aren't canning these, you may use the sanitize function on your dishwasher instead.

Wash tomatoes well and use a skewer or, like I did, a Pampered Chef Hold 'N Slice to poke holes through the tomatoes. I pierced them on 2 sides, going over half way through each time.  The green tomatoes are tough so be cautious and don't poke your hand.


Pack the holey (not to be confused with holy) tomatoes into the prepared jars.

Mix vinegar, water, and seasonings in medium saucepan. Bring to a boil, then simmer for 5 minutes to blend the seasonings. Cool to room temperature and pour over tomatoes.

You may use a fermenting weight to hold the tomatoes down, if you have any that try to float.

Since we are not canning these, I used a plastic Ball storage lid, but you may use a canning 2 piece lid (may be used previously) and band.


Store in refrigerator. I have recently made these, but Pretty Prudent says they will store refrigerated for months.

Wait at least 5 days to a week before tasting. The green tomatoes take a little longer to absorb the seasonings and vinegar. Delicious!

Again, Pretty Prudent suggests using them in salads, pasta salads, cheese plates, relish for burgers and hot dogs, martini and bloody Mary garnish.  I have been eating them right out of the jar, however, they make great garnishes as well as gifts.

I have never canned a tomato with its skin on. I suppose it would become tough. I always recommend tried and true recipes for long-term storage. Recipes from Ball or your local extension office are good places to start. Most tomato recipes that I use require adding lemon juice concentrate (Tablespoon per pint) and processing in a boiling water canner for 45 minutes, which I would think would not give you the consistency you would want in a tomato pickle.

 Good luck!


Sunday, May 4, 2014

I found a really cool blog about soil cube makers.  I am really interested in this and I want to learn more.  Until I can blog about it, here's the link... Daily Bread Living

Soil cubes are are little blocks of soil used to start seeds.  The roots air prune themselves, as long as the cubes are not touching, then the roots can grow into the cube beside it.  It is easier on the plants because there is no root shock when transplanting.  You don't have to peel the bottom off the containers that decompose.

From my various readings, to make soil cubes, you simply mix water with your seed starting soil until it becomes the consistency of oatmeal. I am not interested in using peat, since it is not considered a renewable resource. 

Soil cube makers can save you money since you can use it over and over.

Maybe I will be able to post a tutorial later.  I have tried to contact Daily Bread Living's blogger for more information.

I'll call this entry: To Be Continued...

Photo from http://dailybreadliving.com

Saturday, April 19, 2014

This isn't your ordinary trellis

I have taken a semi-vow not to plant anything I can't eat. That is why I have food growing in my flower bed :). The vow can't be a full-blown vow, because I can't part with my orchids. Are they edible?


I love whimsy. I love having fun and finding things that are out of the ordinary. When I came across this metal dress form while "junking" with my sister-in-law, I knew I had to have it for my garden.  I planted some melting sugar snow peas and they needed some support. I thought, "Why not?" and went with it.
 Placing the form where I wanted it, I made a line in the dirt as a guide for planting. I planted the peas where they would be just under the back of the form. I then placed the form on top and used two electric fence posts to support the dress form, securing them together with zip ties. I should have painted the orange posts black, but didn't have any paint on hand.
This is how it turned out.

 Cute, huh? I hope to add some updated pictures as they grow and let you know if this is as practical as it is cute. Please share your ideas too!


Monday, April 14, 2014

Save the Dirt for the Seeds

It drives me crazy when dirt falls out the bottom of my pots when I am starting seeds. To remedy this, I just cut a little piece of paper towel, newspaper, or a coffee filter and pop it into the bottom before filling it with dirt. Problem solved!

Wednesday, March 26, 2014

Continuous Flow-Through Worm Composter DIY Tutorial

I have had composting worms for many years.  I have evolved in my methods, changing systems as our needs change and to figure out what works best for me and my family. If you go way back to my childhood, I raised worms in a gallon pickle jar for fishing bait and had no idea then that in the future, they would eat my garbage and fertilize my plants.  I have learned so much over the years and thank all the people out there for posting excellent information! 

I have successfully used The Worm Factory for many years.  In fact, I liked it so much, I have two.  Today, I am using one and have moved all the contents of the other one to my re-purposed, never used as a worm bin before, old as the hills, very sturdy, garbage can composter.  I made it myself :) *imagine me smiling really big*

It was so easy!  I scanned the internet looking for ideas. There are some smart and crafty people out there.  I'll post some links at the end of this tutorial in order to give them credit, so be sure to stop by their blogs/channels and show some love.

I have had this garbage can for 20 years.  That is when everything, and I mean everything, was either country blue or mauve.   When the colors finally went out of style, I moved the can into my laundry room, where it has resided.... until now.

The first thing I did was start drilling holes.  I used 1/2" thin wall PVC pipe so I marked my hole centers about 2" apart and used a 7/8" spade blade to drill the holes.  I left enough room at the bottom of the can to allow me to scoop up castings when it is time to harvest them. 

I put the pipe in the holes and used a PVC cutter to cut them to length.  I left about an inch on each end in order to attach a cap to prevent the pipe from sliding back into the can.
I eyeballed it :)  I just had a long piece of pipe, stuck it in so there was about an inch hanging out the back and marked about an inch on the front.  You can see in the picture below, I also marked a door.  There were plastic supports in the bottom of the can so I just went above them and marked it.  I drilled holes in the corners so I could cut it out.
I have no idea how long the PVC "floor" pipes were  I marked them as I went because the can had some curve in it.  I then used a (very dull) PVC cutter to cut the pipe off and capped it to keep it in place.  I haven't glued it at this point because I was not quite sure if I would need to take it apart for any reason.
I needed a scraper to assist with harvesting the castings and I liked this idea.  The scraper pipe will move up and down, as well as back and forth, which I think will help if the compost is arching (not touching the PVC floor). 
I made the scraper handle stick out the front and capped it too. I did glue all the pieces of the scraper together with clear PVC glue.  I didn't want it to eventually fall apart under all that compost.  The scraper handle is above all the "floor" pipes.

I am not sure if the scraper is going to work as well as I had hoped.  Plan B is to ignore that it is in there and use it in cases of the castings arching.  If it doesn't work, I will harvest from the bottom, using a small garden hand rake to gather castings from between the tines.  I don't think I want to use my hands.  I have an irrational fear of spiders, and you know, there could be a spider in that dark place. Yikes!

Another idea I had for the scraper is to put it under the PVC floor and attach screws to the top of the "T" portion, essentially making an attached rake that will go between the pipes, however, that may be too much candy for a dime. :)  I'd love to know your thoughts as well. 

I used cutters to cut out the door.  I think I could have done a better job if I had a fine toothed saw.  I have seen some posts that just cut three sides and leave one short end attached to make a closing door.  I chose to leave mine completely open.
Ta da!  This is what it looks like finished.  There's a nosy cat checking it out.  I don't know if I will need extra ventilation in the top.  I can certainly go back at this point and put plenty of extra holes in the lid, but as you can see, the lid swings and has a large gap so maybe I won't need any extra ones.
To start your composter, you have to add newspaper to the PVC floor to keep everything from falling through.  Once the contents settle, it will hold itself up.  I wasn't sure if I needed to put the newspaper under the scraper or over it.  I opted for under it.  The newspaper will decompose, allowing harvesting to begin. 
I put the newspaper up the sides a little, just to make sure everything stayed in place.  I took the contents from my Worm Factory and started adding it to the can on top of the PVC floor and newspaper.  The scraper is pushed all the way in at this point. 

This is a picture from inside the harvesting chamber.  It shows the underside of the newspaper on top of the PVC floor.  This will decompose.  I put about 3 double layers. (6 pages total).

I kept adding the contents.  Look at all those worms!  The green stuff that looks like plastic is actually compostable bags.
After I filled it up, I put a few sheets of wet newspaper and printer paper on top.  This will also become worm food, which will turn into castings, which will enrich our garden!

The system I use to gather scraps are BioBags along with the Fresh Air Kitchen Compost Collector by Full Circle.  I usually purchase the bags through Amazon by the 4 pack.

I tried using a washable can, but the convenience of just "taking out the garbage" in a bag is easier for our busy family.  The bags I use are 3 gallon and fit nicely in the the Fresh Air Compost Collector. 


Great links for ideas and education...
In no particular order and links open in new tabs:
How Does a Flow Through Bin Work video
Cool idea, but haven't seen it in action: Hungry Bin

I hope you found this post helpful.  I love to read your comments!

UPDATE:
Although I love the design that keeps my worms working, it will not harvest as expected.  The handle will not push/pull due to the weight on top of it.  I also would like a bigger system to handle all of my organic waste, instead of having multiple systems.  I found a Toter flow through compost system that I really want to try with my worms. It isn't marketed for worms, but I don't know why it would not work. 

Monday, April 15, 2013

The Pesky Little Fruit Fly

Warm weather is here, and with it comes those tiny little fruit flies that buzz your head and end up in your perfect cup of morning coffee.
Even though they don't live long, they reproduce at an alarming rate.
They key is to trap them fast. There are many different ways to trap them. You can use fruit in a jar with holes in the top or you can use yeast, water, and sugar. Since they are attracted to fruit and the fermentation process, beer works great. I used the Bud Light Margarita. I was surprised at how fast they started coming to it.
Here's what to do:
Just wash out an old jar. I used a salsa jar since the flies are attracted to yellow and orange. I poked some small holes in the top using a screw (because I couldn't find a nail) and a hammer. Then I filled it half way full with the margarita and three drops of dish soap.
The dish soap breaks the surface tension and causes them to drown so they don't reproduce in your trap, which is another problem with using only fruit.
I hope this works for you.
Alternatives to place in the trap with dish soap are apple cider vinegar or wine. You may have to experiment to see what is the beverage of choice for your fruit flies. I usually set out a few with different liquids in them. I figured they liked menu options :)

Wednesday, April 10, 2013

Starting Seeds

I had watermelon, radish, and  cantaloupe seeds I needed to start.  It is a lot easier to start seeds in a sunny window inside, so I went looking for something to put them in. Pinterest had the answer... egg shells.


Just crack the eggs (I tried to crack them closer to the small end), RINSE THEM OUT (very important), add a little soil ( I used organic), and plant your seeds.
When they sprout and are ready to be moved outside, just crack the egg a little more and plant the whole thing.

Sunday, February 24, 2013

Worm Tower

So I decided my raised bed (we call them garden boxes here in the South) needed a source of natural fertilizer. We already use vermicompost from our two Worm Factory bins, but thought having the actual worms in the garden box would be better for the soil due to the worms basically being "little tillers" and making the soil nice and aerated.

There are many ways to make a worm tower. Many people use food grade PVC pipe because it is easy and all you need is an upside down  flower pot for the lid.  I prefer the wooden one (untreated wood) because I think it looks better.  I also think the wood will have some insulating properties; it gets pretty hot here.

I have to thank my husband for helping me and not once complaining. He's the best!

Keep in mind that these measurements are ours and don't have to be exact. Use what you have. I have seen some that are really tall and others that are made of short pipes.


First, we cut out 4 sides that were 22" long. I'm working at my kitchen table because it is storming outside.
Be sure to use outdoor wood glue on the edges before screwing your boards together.
Next, we put them together in a square. Notice there are screws visible on only the left side of the box due to the way we stacked it. This will make it stronger.  Also, notice we turned the wood grain to where it is cupped  to the inside of the box.


This is my trick for finding the center of the board when I have to attach the sides.  I am excellent at getting too close to the edge and missing my board or going in so close that the screw sticks out the side. Not anymore.
See. The screw went in and is in the center of the board that you are attaching to.
You may not need this step, but it works really well for me.

Drill pilot holes so you don't split your wood.
We used deck screws to attach the sides.
This is what it looks like at this point.  Now we need a lid and a vent hole.
I used a 1/4" spade bit to drill a vent hole in the center of one side near the top. This just lets warm air out.
The exact size isn't important. You can even use a small bucket or terracotta planter saucer as a lid. I like the wooden one because I think it looks better. The blocks are 4 1/2" by 1 1/2" and are used to keep the lid from falling off.  They also add a little extra weight for those extra windy days.  If you are extra creative, you can use a router to make the edge more decorative.
To drill your hole to attach the nob, you'll need to find the center of the board.  Just use a ruler or other straight line and draw from corner to corner, making an X in the middle. That's the center of the board.  Drill a hole for the nob in the middle.
 
X marks the spot.
Follow package directions on attaching the nob.  We used a wooden drawer pull.  You most certainly can use ceramic, but keep in mind it will be outside and will be in the sun and rain (not much sleet and snow here).

After drilling your hole. Attach the blocks to the underside of the lid. Make sure to use some more wood glue.
Now it is time to drill some holes so the worms will be able to get out and go into your garden to leave their precious black gold in the soil and be able to return for dinner.
I used a 1/2" spade bit and drilled 15 holes in each side. The placement is not important. Remember, this part will be in the ground so nobody will see it.  Worms don't have eyes so they won't care either.  Just make sure you have plenty of holes and they are big enough.  If in doubt, go bigger, or at least a lot more smaller ones. 
Yes, there was saw dust all over my kitchen.
Here's the finished worm tower. Ta Da! The way you use it is you place it in your garden or garden box by burying it in a hole making sure all the holes are underground.  place some moist shredded newspaper in the bottom with a handful of composting red worms. I got mine from Uncle Jim's Worm Farm.  Then, you feed them your kitchen scraps.
To finish it, we are using boiled linseed oil, which is not toxic but will help preserve our wood.  It won't last forever, but it will slow the rotting process.
 There is a wealth of information online.  I encourage you to read Feeding Your Worms
There are many articles out there that will give you plenty of advice.

A few tips from me:
  • Use citrus and peelings in moderation, the more acidic foods you add, the more base (eggshells) you need to add.
  • Worms LOVE corrugated cardboard.  They lay their eggs in it if it is near food. However, I don't think it should go in a worm tower because it takes too long to break down.  The whole concept is to get the nutrients out into the garden and not build up castings in the tower. 
  • Never put meats, oils, or dairy in your vermicomposter or worm tower.
  • Put your weeds from your garden into your worm tower. Serves them right. How dare they grow in your garden.
  • Use lots of worm towers. Flowers, as well as food gardens love worms and their castings.
  • Eventually, you will have to move it around.  When you do, keep it "within reach" of your established worms in the garden so they can use it again. Unless you have an established indoor vermicompost system, then you can just add worms you already have or just buy more. 
Here's a great picture on how the worm towers work.
I actually made two of these (one for a friend). She wanted to paint the top of hers while I wanted to leave mine natural. Mine (on the left) is covered in boiled linseed oil all over.  I covered hers on the bottom and on the entire inside for protection.