Insert Background Code Here

Hover over an image to Pin It

Showing posts with label art. Show all posts

Monday, January 6, 2014

More Mug Rug Ideas

If you read my last post on Mug Rugs - A Picture Tutorial, you may be interested in seeing some more I completed for Christmas gifts.  If you haven't read it, you're missing out :) I go step by step in the making of your very own mug rug.

Most of the designs are posted to my Mug Rug board on Pinterest.  It should link back to the original web page.  If it doesn't and you are the owner of the page, please let me know so I can link it to you.

It is really easy to take any clip art and use freezer paper to turn it into a design for your own mug rug.


I'd love to see designs you have made!

I am a scrapaholic and I love fat quarters.  I have so many little pieces of fabric, this is a great way to put them to good use.  If you follow my posts, you will notice the same fabrics in several of my pieces.

I made this one for my sister-in-law.  She like polka dots as much as I do and I loved the whimsy little design.

Kissing Birds
Yes, my ironing board is stained (*shamefully hanging head).  Don't look at that :)  I have washed and washed and it will not come out.  I can't find a replacement that fits and I would rather sew for my friends than spend time making a new one.

The apples I designed myself using free clip art from a Google search and customizing the bite mark myself.  My mom (loves apples and burlap) got the apple and burlap and my sister (a school teacher) got the polka dot apple.


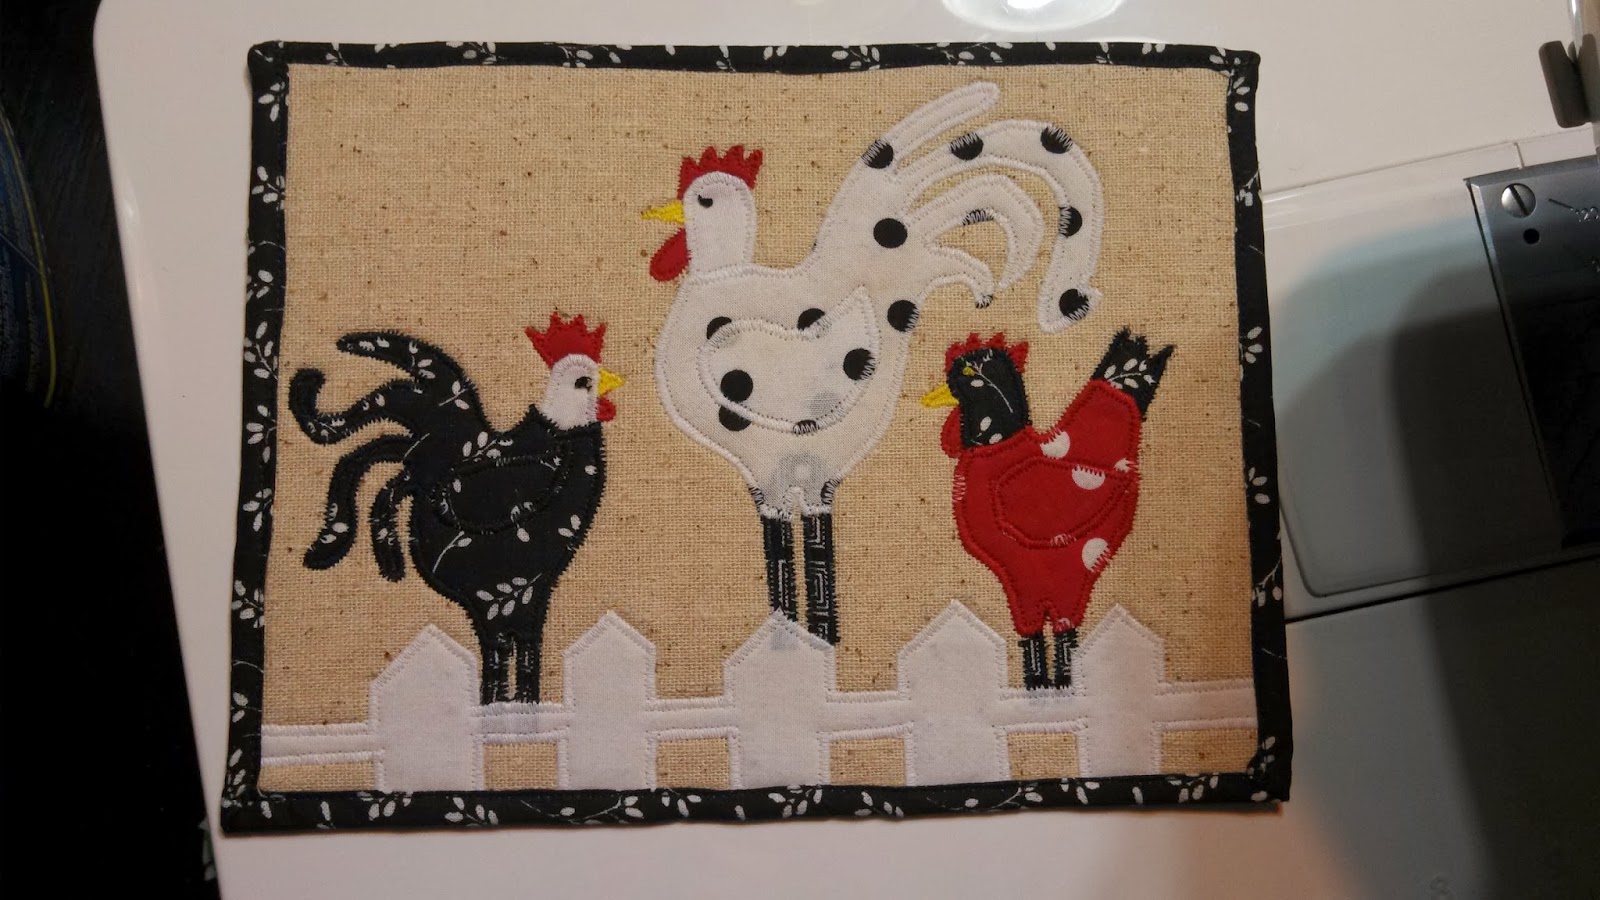
 A friend that likes chickens got this one.  It was fun to make, but very time consuming due to the feathers in the applique design.
Another friend got this one.  She LOVES the beach.  It was a design posted to Flickr and I changed it a wee bit.  You can tell I use the same scraps because one of my ocean waves is the same as the bird above. :)
I loved the hen so much I had to make another one.  This is going to another one of my "country" friends.  I think the hay just makes it.
Do the fabrics look familiar by now?
 I think this owl turned out nice.  I ended up making the black part of the eyes with an eyelet stitch with my sewing machine.
 I did one that was a bass jumping to catch a fly (the fishing kind) and I don't think I took a picture of it (gasp!).  If I find it, or can get the person who has it to take a picture of it, I will definitely post it.

I hope you enjoyed seeing these designs.  They were all really fun to make!

Wednesday, November 13, 2013

Snapazoo - How cool!

I just ordered 100 KAM snaps and the snap tool.  I've been using metal snaps (the kind with metal prongs that bend into the snap to secure it to the fabric) and I absolutely hate the pliers that came with them to put them together.  I have tried to set them using my Crop-a-dile, which only sets the female (receiving) end.  It works really well for that.  The male end requires me to use the tool that looks like pliers because of the prong that sticks up.  I have been tempted to drill a hole in the flat block of my Crop-a-dile (Yikes!).

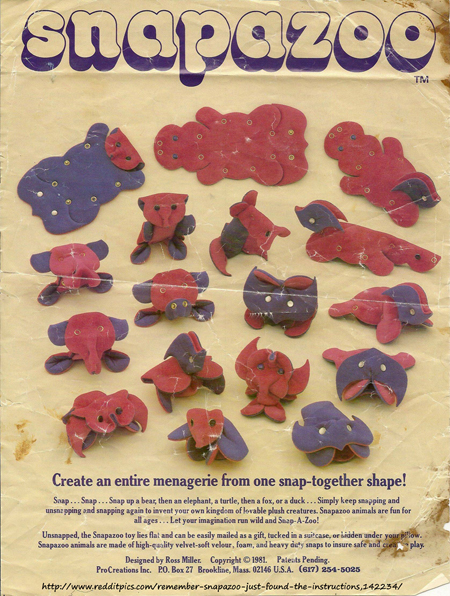
While searching for snaps and alternative tools, I came across this cool little toy made from material and, you guessed it, snaps.  Apparently, you can make an entire zoo out of one toy.  I can see this being handy on a road trip.  I think older children would like to use it for the challenge and young children could use it for dexterity training.

Apparently, it isn't sold anymore, but there is a tutorial on how to make it.   It looks easy enough to sew, but getting all the snaps, male side v. female side, in the right order might just make me cross-eyed!  I do think this is awesome and if I try it, I will post pictures.  If you try it, let me know how it works for you.

Follow this link to see a cool tutorial on the Snapazoo toy. 


Friday, February 11, 2011

My mixed media made with cricut

I sent this to my friend Dorothy as a gift. Sometimes it is just nice getting surprises in the mail. I really think she liked it.

It was made using  Cricut Home Decor Solutions Cartridge assorted scrapbooking paper in brown, yellow pattern, blue pattern, light pink pattern, dark pink pattern, and green pattern, acrylic paint for the background, and 1/4" ribbon for hanging. Matte Mod Podge was used to glue the paper to the 12x12 canvas.

Friday, July 23, 2010

Make Your Oil Bottle Pop with Polka Dots!

I decorated my oil bottle using black self-stick vinyl. The D was cut using Doodletype at 1 3/4" and the polka dots were made using Plantin Schoolbook circle cut at 3/4". You can make it from any glassware such as cake plates or trifle bowls.

I have olive oil in mine, but you can use the bottle to store your dish soap, but add a little water to it so it will pour out.

Sunday, June 6, 2010

Painting a Glass Pitcher

This is one of my FAVORITE paintings! I love to oil paint so I though I would share one with you. I was worried that I wouldn't be able to paint a glass vase/pitcher, but it turned out nicely! I would love to do another one like this, but with daisies in it with some twigs. I love daisies and it would be a nice touch to liven up a room. Don't you think? Anyway, I'll try to share more later.
Posted by Picasa