Insert Background Code Here

Hover over an image to Pin It

Tuesday, January 14, 2014

DIY Dress Form

If I were the crime committing type, now would be the time to do it.  I say that because I have no fingerprints left on my fingers.  In fact, I don't think I have much skin left either!

This all started when I purchased my mom an online class from Craftsy.   Hopefully, I'll get a broomstick lace cardigan out of it ;)

It was proving difficult for her to get her measurements correct so I suggested making her own dress form.  I had seen them on other websites.  They range from simple tape mannequins to paper mache masterpieces.

In order to complete the duct tape mannequin I had dreamed up, mom had to run some errands on her own since I was working.  She came across this nice hat/coat rack at a thrift store and snagged it... perfect for the stand.

The next thing was making a tube for the middle of the form.  Since we didn't have a mailing tube, or even a wrapping paper tube, we made our own out of two potato chip cans and a creamer container.
Plenty of duct tape (the good brand) keeps it together.
Next, we dressed mom in garbage bag attire to keep the tape off her clothes and skin.  She was wearing a tank top and leggings to keep the form from being too bulky.
Then, the taping begins.  We crossed her heart (bra style) and kept going and going and going.  Not quite like the energizer bunny (did I mention that I worked last night and I am running on fumes with no sleep).

More taping.  We made sure the shoulders were sturdy.
We taped her neck last since she said she was a little tight in there.  Didn't need an emergency...

 This may just be a new fashion statement.
Now we get to cut it off
 I carefully cut up the back.  She acted like she trusted me.  I tried to be careful not to cut her clothes.  I cut through the plastic bag as well as the tape.  I did have a new skin stapler that I could have tried if I had cut her!
 At this point, she could slide it off her shoulders, but you can cut across the top of the back to get it off if the arms are too tight.
We put the tube inside the form.  The top potato chip can metal end was left in place and a hole was punched in it to attach it to the stand.  We used newspaper and phone books to stuff in the form at this point.
 We tried to keep the tube in the middle of the form as we stuffed, and stuffed, and stuffed.  Did I mention that all the ink was rubbing off on our hands.  Yuck!
 The back seam was lined up and more tape was used to mend it back together.
When we stuffed as much as we could, we cut a piece of cardboard for the bottom and, you guessed it, taped some more.  Now you know why I don't have fingerprints anymore!  Duct tape is sticky!

This is what we have so far... So, it seems as if our mannequin has developed a belly button and it won't go away.
 We had plenty of help... A little too much at times.
 Using this spray foam insulation, we filled any gaps or soft spots we had.
 I had to do this outside.  I just took a box blade and made a slit, put the tube in and filled it up.  I did this in several places.
 You may want to wear gloves for this step.

The spray foam will come out the holes.  Don't touch it!  It will stick to you faster than it will stick to anything else.  Just let it dry on the duct tape and then just pull it off.


 We have one of the pieces of the stand off.  It really will not be this short.
Chloe tries to look cute while we work.

We are getting closer.  We have pulled off the foam that leaked out and now we will tape up the holes made to put the foam in.
 The form is complete, now we just need to make it pretty.
Mom wanted a red dress form.  It almost looks orange in the picture, but it is bright red.  We simply just covered up the ugly duct tape with the red.  The pretty duct tapes don't seem as strong so get a good silver one to do the main form, then you can add the pretty stuff.

It needed a little more dressing up, so we added some pizazz to the bottom with zebra striped duct tape.  Yes, my OCD required me to tape a little inside the potato chip can.  It kind of looks like a magic eye picture.
 This step wasn't absolutely necessary; I just couldn't help myself.
Ideally, the form should be your height so you will be able to gauge how long to make skirts, etc.  Mom will be crocheting and using her form to measure tops while she is sitting, so she wanted it shorter.  That's what makes these so neat.  They fit your needs.
 Tada!  Here it is, naked and cute as can be.  We couldn't cut the top of the coat rack off, but she plans on using the top of it to finish off the top of the neck.
 Here's another picture.  It really looks like it has a belly button.  I don't know how to fix that.
 The form spins freely on the stand.


Wednesday, January 8, 2014

Peppermint Cocoa Mix

If peppermints aren't your thing... keep reading, there's something for you too.

In South Alabama, 11 degrees is cold - too cold.  Now, I know our friends in colder climates think "that's nothing" because my great uncle in Fargo says they are expecting -35 and he is OK with that.  Well, I'm not.  I hate being cold.   I am wearing wool socks as I type this.  It is not unusual for our temps to reach 105 in the summer... That's what I'm talking about.  A nice dip in the pool just cools us right down, but it is hard to warm up!
Well, since our weather forecasters say that we will be below freezing for at least 64 hours, we need something to help warm our bones.  I think this hot peppermint cocoa is just the thing!  It is so easy to make too.

I searched and searched the Internet for a recipe that we liked.  I eventually made up my own, so now I'll share it with you.  Please feel free to comment and share your recipes and ideas.

You will need:
1 1/2 cups powered cocoa
3 cups dry milk powder
2 1/2 cups granulated sugar
1 1/2 cups crushed peppermints
1 teaspoon table salt
Airtight container for storing
Large mixing bowl
Whole peppermints for garnish (optional)

First, "peel" (take the wrapper off) and crush up enough peppermints to make 1 1/2 cups.  I used my food processor to crush the peppermints, but I think they came out too powdery.  That wasn't what I was going for.  I think next time I will just put them in a large plastic zippy bag and use a rolling pin to crush them.  Having larger pieces will probably cause me to omit the whole peppermints for garnish.

I actually just put everything in my food processor.  Probably because I am addicted to using "gadgets" as my father says, but I think it is easier and faster.


Measure out the cocoa, dry milk powder, sugar, and salt.  Place in mixing bowl or food processor :) with the crushed peppermints and blend well.

How easy is that?

As for the cocoa powder, I live in a small town, so I use the only brand our grocery store sells.  There's a lot of gourmet cocoa out there, which is a plus if you can get your hands on some.  Use whatever brand you like.
After blending well, put your homemade Peppermint Cocoa Mix into an airtight container and garnish with whole peppermints if desired.  It looks really pretty to stack some on top of the mix if you are giving it in a pretty jar as a gift.  I would be cautious with kids though.  You don't want to cause a choking hazard.


I actually had many peppermints in this, but my children really like it and have devoured it.  The whole peppermints are mostly covered in the picture, but they are in there.

You can use milk or water (there's milk powder in it) to make your hot cocoa.  We prefer milk because it makes it really creamy and will make a nice froth on top.

Heat your milk or water on the stove or in the microwave until hot.  Stir in about 3 tablespoons cocoa mix per coffee mug (8oz-16oz).  Adjust your measurements for your taste.  Don't forget to add a whole peppermint, if you desire.  Mine usually melts by the time I get to the bottom of the mug.

Look at that froth! YUMMY!

If peppermint's aren't your thing, just omit them.  They can even be substituted with mini chocolate chips, caramel chips, toffee chips, dried raspberry pieces, marshmallows, or anything else you can dream up that goes well in hot chocolate.

ENJOY!

Monday, January 6, 2014

More Mug Rug Ideas

If you read my last post on Mug Rugs - A Picture Tutorial, you may be interested in seeing some more I completed for Christmas gifts.  If you haven't read it, you're missing out :) I go step by step in the making of your very own mug rug.

Most of the designs are posted to my Mug Rug board on Pinterest.  It should link back to the original web page.  If it doesn't and you are the owner of the page, please let me know so I can link it to you.

It is really easy to take any clip art and use freezer paper to turn it into a design for your own mug rug.


I'd love to see designs you have made!

I am a scrapaholic and I love fat quarters.  I have so many little pieces of fabric, this is a great way to put them to good use.  If you follow my posts, you will notice the same fabrics in several of my pieces.

I made this one for my sister-in-law.  She like polka dots as much as I do and I loved the whimsy little design.

Kissing Birds
Yes, my ironing board is stained (*shamefully hanging head).  Don't look at that :)  I have washed and washed and it will not come out.  I can't find a replacement that fits and I would rather sew for my friends than spend time making a new one.

The apples I designed myself using free clip art from a Google search and customizing the bite mark myself.  My mom (loves apples and burlap) got the apple and burlap and my sister (a school teacher) got the polka dot apple.


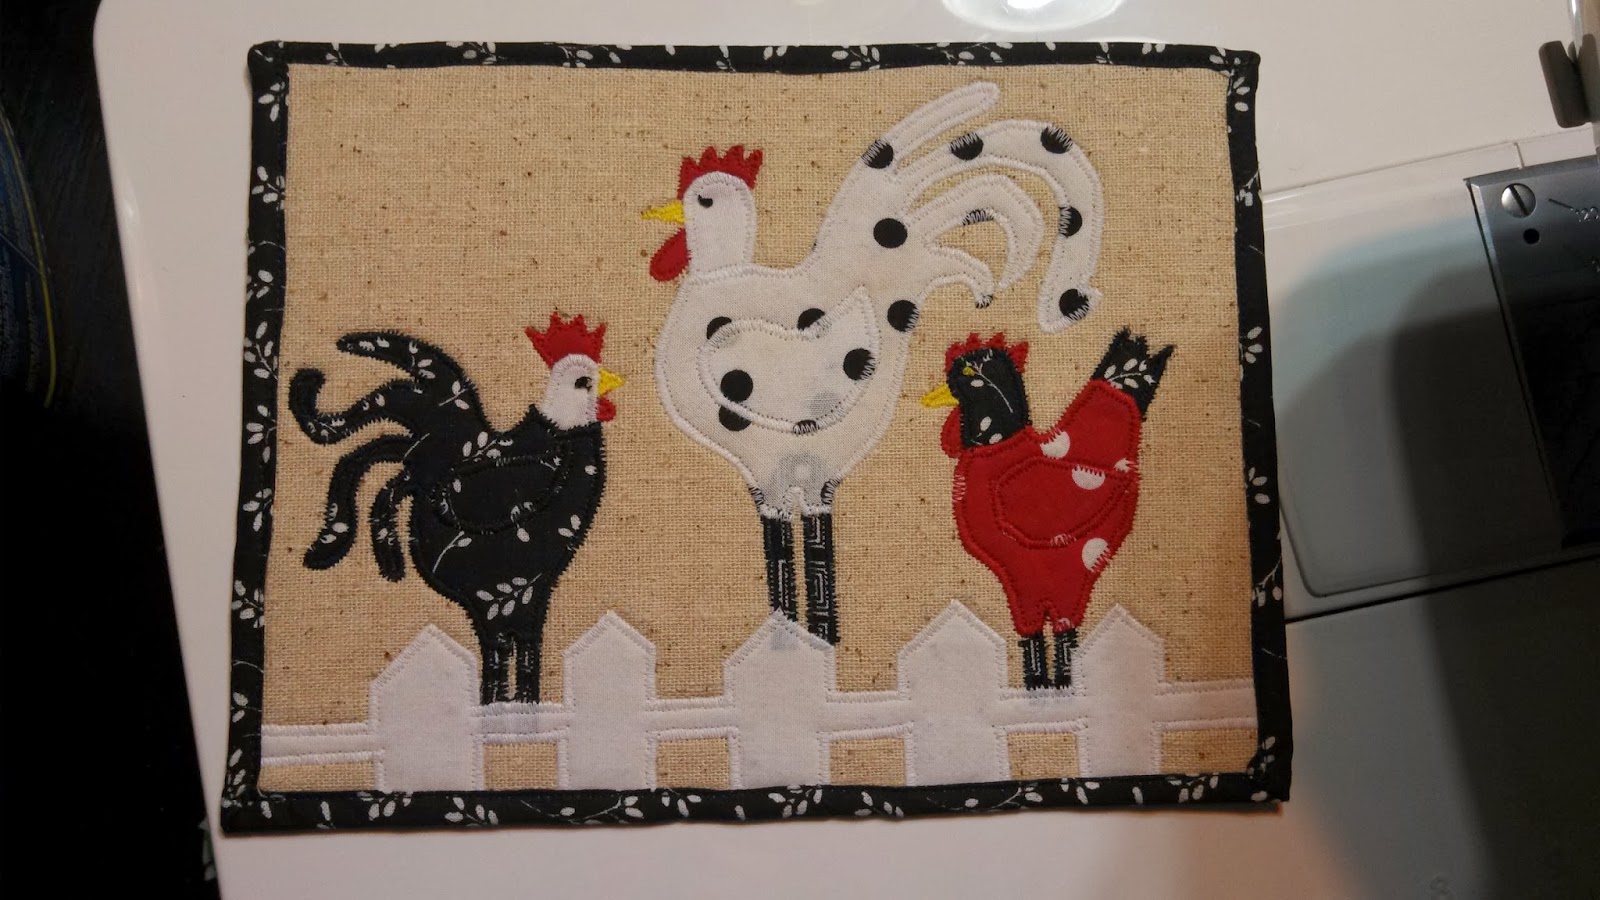
 A friend that likes chickens got this one.  It was fun to make, but very time consuming due to the feathers in the applique design.
Another friend got this one.  She LOVES the beach.  It was a design posted to Flickr and I changed it a wee bit.  You can tell I use the same scraps because one of my ocean waves is the same as the bird above. :)
I loved the hen so much I had to make another one.  This is going to another one of my "country" friends.  I think the hay just makes it.
Do the fabrics look familiar by now?
 I think this owl turned out nice.  I ended up making the black part of the eyes with an eyelet stitch with my sewing machine.
 I did one that was a bass jumping to catch a fly (the fishing kind) and I don't think I took a picture of it (gasp!).  If I find it, or can get the person who has it to take a picture of it, I will definitely post it.

I hope you enjoyed seeing these designs.  They were all really fun to make!